mirror of
https://git.mirrors.martin98.com/https://github.com/infiniflow/ragflow.git
synced 2025-06-04 11:24:00 +08:00
### What problem does this PR solve?

update for v0.19.0

### Type of change

- [x] Documentation Update
73 lines
2.7 KiB
Plaintext
73 lines
2.7 KiB
Plaintext
---
|
||
sidebar_position: 9
|
||
slug: /tracing
|
||
---
|
||
|
||
# Tracing
|
||
|
||
Observability & Tracing with Langfuse.
|
||
|
||
---
|
||
|
||
:::info KUDOS
|
||
This document is contributed by our community contributor [jannikmaierhoefer](https://github.com/jannikmaierhoefer). 👏
|
||
:::
|
||
|
||
RAGFlow ships with a built-in [Langfuse](https://langfuse.com) integration so that you can **inspect and debug every retrieval and generation step** of your RAG pipelines in near real-time.
|
||
|
||
Langfuse stores traces, spans and prompt payloads in a purpose-built observability backend and offers filtering and visualisations on top.
|
||
|
||
:::info NOTE
|
||
• RAGFlow **≥ 0.19.0** (contains the Langfuse connector)
|
||
• A Langfuse workspace (cloud or self-hosted) with a _Project Public Key_ and _Secret Key_
|
||
:::
|
||
|
||
---
|
||
|
||
## 1. Collect your Langfuse credentials
|
||
|
||
1. Sign in to your Langfuse dashboard.
|
||
2. Open **Settings ▸ Projects** and either create a new project or select an existing one.
|
||
3. Copy the **Public Key** and **Secret Key**.
|
||
4. Note the Langfuse **host** (e.g. `https://cloud.langfuse.com`). Use the base URL of your own installation if you self-host.
|
||
|
||
> The keys are _project-scoped_: one pair of keys is enough for all environments that should write into the same project.
|
||
|
||
---
|
||
|
||
## 2. Add the keys to RAGFlow
|
||
|
||
RAGFlow stores the credentials _per tenant_. You can configure them either via the web UI or the HTTP API.
|
||
|
||
1. Log in to RAGFlow and click your avatar in the top-right corner.
|
||
2. Select **API ▸ Scroll down to the bottom ▸ Langfuse Configuration**.
|
||
3. Fill in you Langfuse **Host**, **Public Key** and **Secret Key**.
|
||
4. Click **Save**.
|
||
|
||
|
||
|
||
Once saved, RAGFlow starts emitting traces automatically – no code change required.
|
||
|
||
---
|
||
|
||
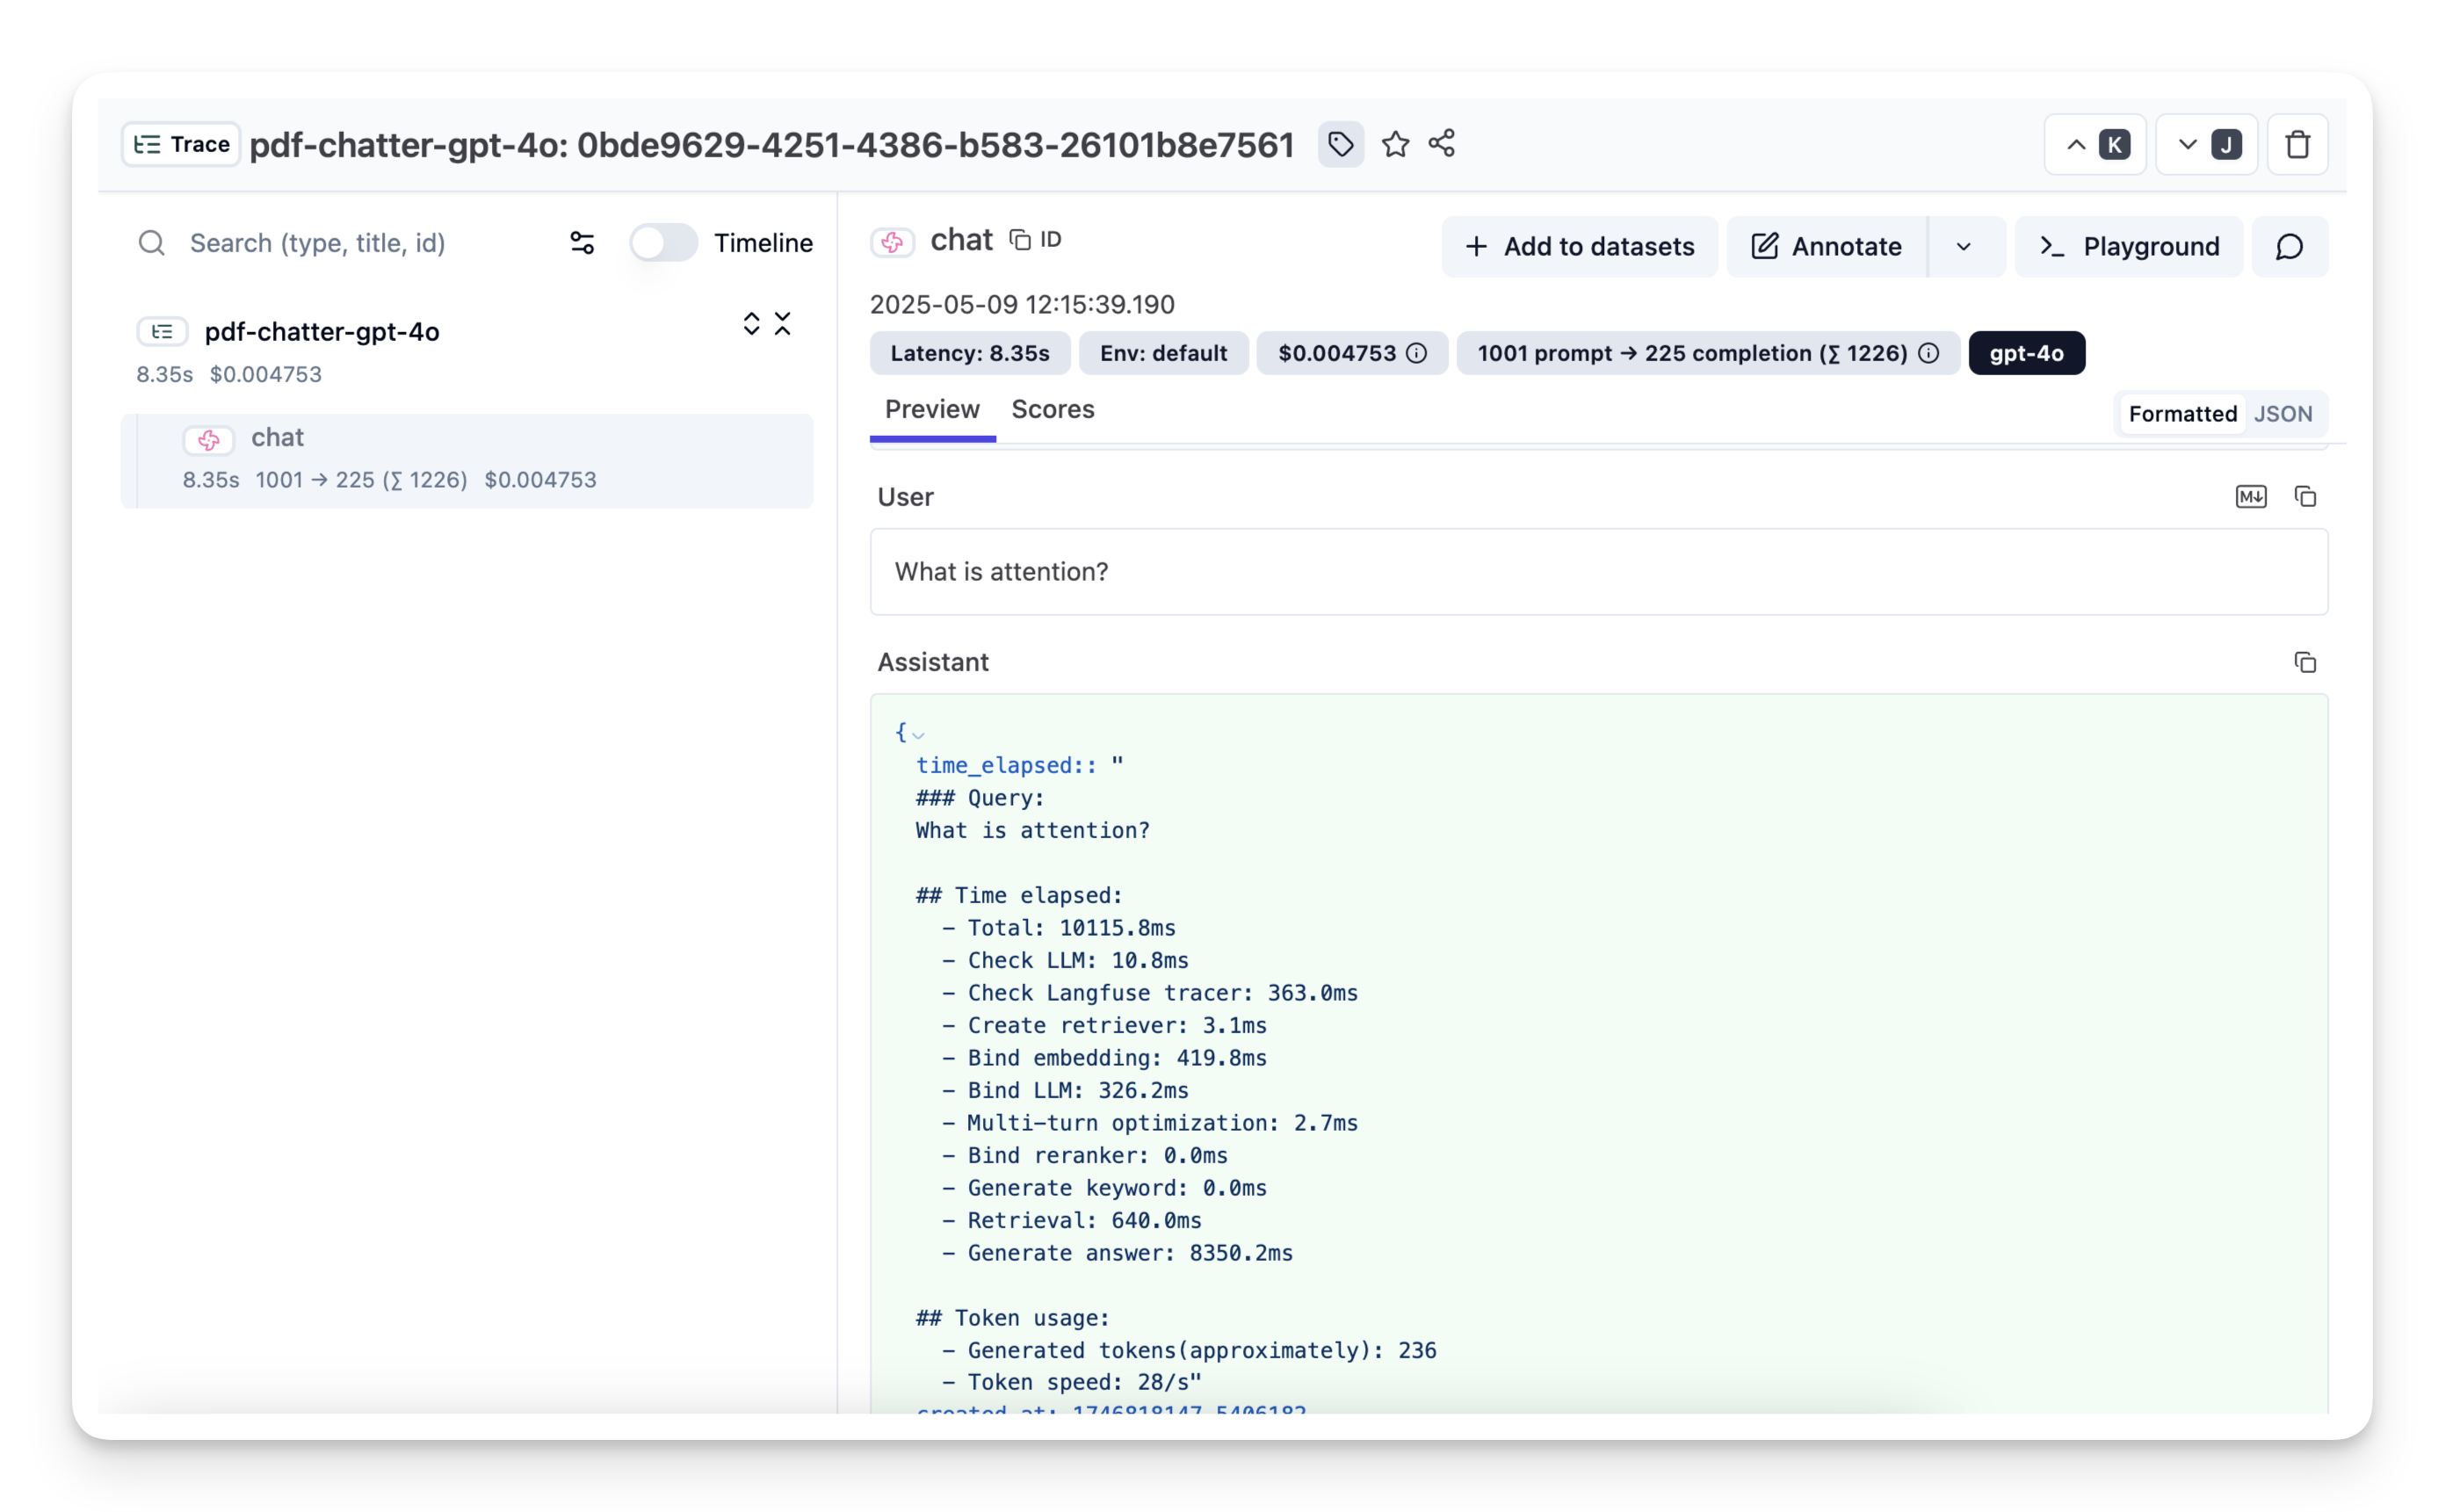
## 3. Run a pipeline and watch the traces
|
||
|
||
1. Execute any chat or retrieval pipeline in RAGFlow (e.g. the Quickstart demo).
|
||
2. Open your Langfuse project ▸ **Traces**.
|
||
3. Filter by **name ~ `ragflow-*`** (RAGFlow prefixes each trace with `ragflow-`).
|
||
|
||
For every user request you will see:
|
||
|
||
• a **trace** representing the overall request
|
||
• **spans** for retrieval, ranking and generation steps
|
||
• the complete **prompts**, **retrieved documents** and **LLM responses** as metadata
|
||
|
||
|
||
|
||
([Example trace in Langfuse](https://cloud.langfuse.com/project/cloramnkj0002jz088vzn1ja4/traces/0bde9629-4251-4386-b583-26101b8e7561?timestamp=2025-05-09T19%3A15%3A37.797Z&display=details&observation=823997d8-ac40-40f3-8e7b-8aa6753b499e))
|
||
|
||
:::tip NOTE
|
||
Use Langfuse's diff view to compare prompt versions or drill down into long-running retrievals to identify bottlenecks.
|
||
:::
|
||
|