* add a page about cybersec

* WIP build process

* finished build process

* simplify and enhance wiki section erase flash

* add [ESP444]RESEt solution

* add ESP710

* add link to discussion FAQ

* code review

* add links to core installation process
6.3 KiB
Buildind code
Table of contents
- Building with PlatformIO and VScode (recommended method)
- Building with Arduino IDE
- Common steps for all methods
- Additional tips
- Full ESP erase
Building with PlatformIO and VScode (recommended method)
- Download and install Visual Studio Code
- Download latest release of this project
- Extract it anywhere
- Open the forlder containing the project from within VScode (file->open folder)
- Let VScode install exptension packages recommended by the project.
- A popup should appear in lower right corner
- It will install extensions listed in .vscode/extensions.json
- Wait for complete installation
- Build with PlatformIO
- Click to open the platformIO tab on the left (or ctrl+maj+P and type
View: Show PlatformIO) - Unwrap target corresponding to your board
- Click on
Uploadto build and upload FW to ESP board
- Click to open the platformIO tab on the left (or ctrl+maj+P and type
Follow additional steps here
Building with Arduino IDE
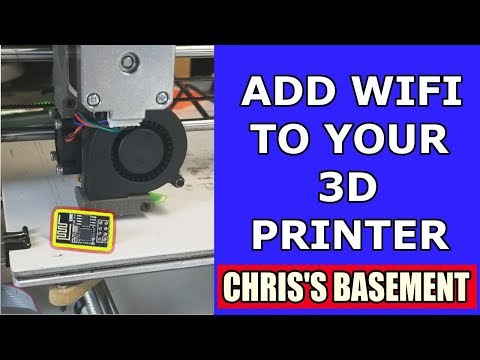
Video guide by Chris Riley
Written guide
- Arduino IDE
- Download Arduino IDE version 1.x.y from https://www.arduino.cc/en/Software
- Install the Arduino IDE
- Additional libraries
- Open the Arduino IDE go to File -> Preferences
- In the "Additional Boards Manager URL" field, add following URLs:
- https://arduino.esp8266.com/stable/package_esp8266com_index.json details about installation here
- https://raw.githubusercontent.com/espressif/arduino-esp32/gh-pages/package_esp32_index.json details about installation here
- Click OK
- Click Tools -> Boards -> Board Manager
- Scroll to near the bottom, and find "esp8266 by ESP8266 Community" and click on the row
- On the "Select Version" dropdown, select version according to ESP3D home page
- Wait for the ESP8266 support to be installed
- Download latest release of this project
- Extract it to your sketchbook or other location
- Copy the libraries present in the ESP3D-x.y.z/libraries directory into your Arduino/libraries directory. These versions are verified to work with ESP3D, any others (newer version) may cause untested behavior. More information about libraries installation options here
- Open the Arduino IDE and open the project file esp3d/esp3d.ino (ESP8266/esp8266.ino for older versions)
- Configure for your board
- Get flash sise of your board
- Apply correct setting in Arduinio -> tools ->board
- Double check you have the clock speed set to 160Mhz
- Double check you have the correct Flash size selected
- Upload the sketch
- Configure your ESP8266 or ESP32 for upload (USB to serial plugged in, GPIO0 and GPIO15 pulled low, RST pulled high)
- Click the Upload button in Arduino IDE (Or press Ctrl+U)
Follow additional steps here
Common steps for all methods
- Starting the board
- Reboot the ESP8266 or ESP32 into run mode (USB to serial removed , GPIO0 pulled high, GPIO15 pulled low, RST pulled high)
- Find the wifi AP (Access Point) called ESP3D (or ESP8266 in older versions)
- Connect to the wifi AP using the default password of 12345678
- Initial configuration
- Open device web page on the AP connected device with one of 2 following options:
- Accept Captive portal redirect
- Open a web browser and navigate to http://192.168.0.1
- Upload index.html.gz file to the SPIFFS filesystem using web page uploader
- Open device web page on the AP connected device with one of 2 following options:
- Configure device
- If authentication is enabled use pair user/password admin/admin
- I recommend changing to Station mode and connecting to your home/office Wifi instead of staying in AP mode
- You may want to change the Baud rate
- You can change to DHCP, or at the very least setup a Static IP you are familiar with
- Connect ESP board to your printer motherboard
- More details can be found here
Additional tips
-
If you plan to access your ESP from public network, think about cybersecurity
-
You can use Arduino serial monitor or PlatformIO
Monitortarget to see debug info from ESP and send commends for configuration. Commands are documented in wiki/docs folder -
After applying power the ESP takes several seconds before it will send
M117 <ip address>on the serial port. The delay can be up to 30 seconds depending on configuration. If your printer is connected to the ESP, and has an LCD connected, the M117 command is "Print this message to the LCD" - i.e after a successful boot it will print the IP address to the printer's LCD -
Depending on configuration file, you may pull down GPIO2 during reset/powerup to wipe the settings stored in EEPROM.
-
If behavior is not consistent, you may need to erase the full flash on ESP board.
Full ESP erase
There are several options to erase flash configuration:
- Execute
[ESP710]FORMAT(or[ESP710]FORMATFSfor newer versions) after upload and restart the board. It's also possible to do[ESP444]RESETto reset only EEPROM parameters without erasing SPIFF memory. - In Arduino IDE, you can configure erase method in tools->Erase Flash->All Flash content. This will erase whole memory at next upload.
- Using PlatformIO if there is a target Patform->Erase Flash for your board
- Using esptool with command
esptool.exe --chip auto erase_flash